
Welcome to my blog, or maybe I should be saying "thanks for sharing my birthday present with me". Yep, this blog was designed for me by a niece & nephew as an outlet for all my crafting fun - so this was my birthday present from them. "A Blog" - do you know how terrifying that is to someone who hasn't written anything but reports for the past 35 years along with an annual Christmas letter. Reports are easy - the Christmas letter takes me 4 weeks to write.
For the last 6 months, I've attempted to write this blog and not been happy, so I had my niece read what I had written and she said "You're not writing a report, Aunt Dee, write like you talk - tell a story". I haven't had the heart to tell her that everyone tells me "I talk TOO much".
Anyway, I'm a Jill of all crafts. I'm a seamstress and have sewn for close to 50 years, I crotchet (hate knitting), embroidery, crossstitch, needlepoint, make ceramics, create jewelry, bookbinding, calligraphy and papercrafting. In otherwords, I've dabbled in it all.
My latest project has been so much fun and that's what I'm sharing today. My sister-in-law, asked me to create a special dedication (christening) book for her daugher's baby gift that can be passed on through the generations along with the dedication outfits she created from her wedding gown.
 Using book board, rice paper, and watercolor paper, I created an 80 page hard-bound 5 X 7 book with gilded pages. Included in the front of the book is a Bible Verse, written in Uncial Calligraphy (Matthew 19:14) and my sister-in-law's wedding picture.
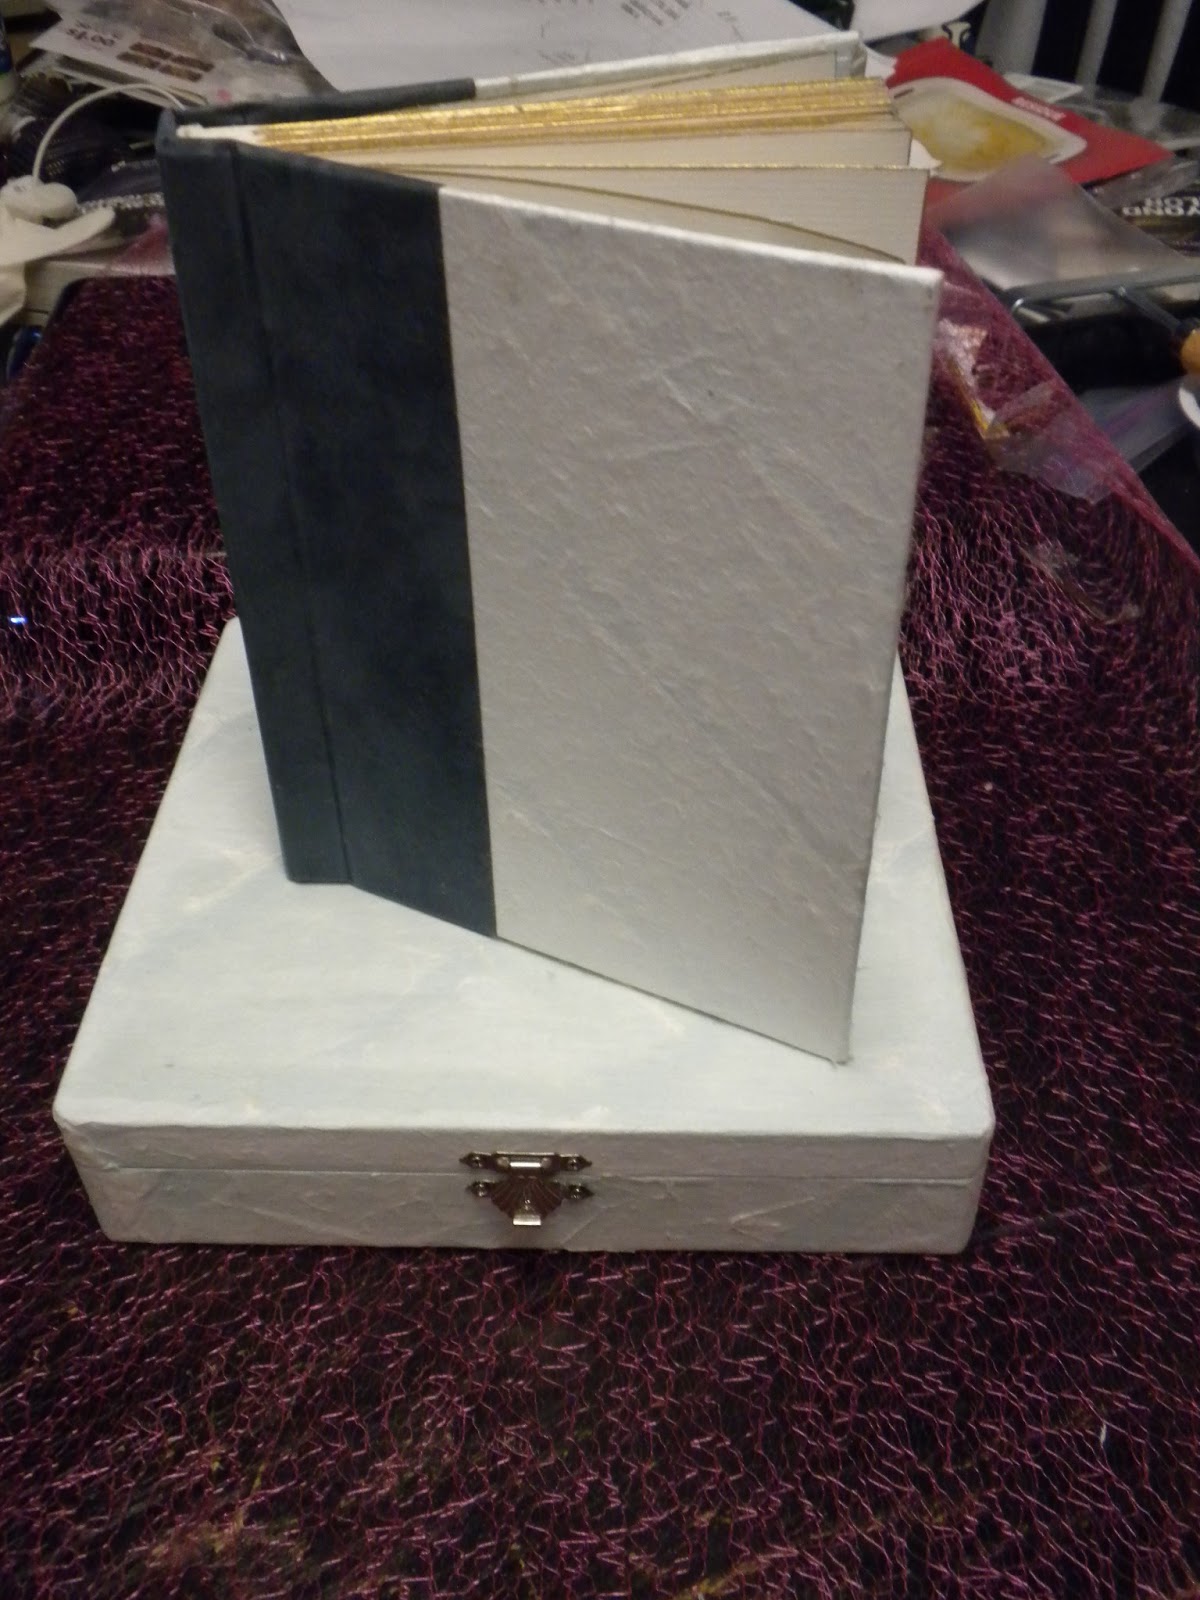 he outside of the book is a double layer of blue watercolor paper, overlapped with white rice paper. The spine binding is a blue suede paper. Inside, the same blue water color paper covers the front and back of the book. The inside book blank is made from Arches watercolor paper (off white) It was cut to 5 1/2 X 7, scored at the 1/2 mark for a fold line leaving a 5X7 page. I gilded the edges of each page and added a spacer onto the 1/2 space which allows pictures to be added to the book without increasing the thickness of the book on the open side. The pages were then stacked, pressed and glued and inserted into a cover, creating the book blank and then inserted inside the hardback cover and glued to the spine. ( Note: I layed pictures on every page so that the book was one thickness and placed in the press to allow the book blank to adhere to the binding.) The inside covers were glued in place and the book was completed.
Matching the book was a small wooden box, lined with acid free paper for the book to be housed. I covered the painted box with the rest of the rice paper using modge podge and then sprayed it with a matte sealer.
You can find bookbinding tutorials on line or at your local craft store. Take a chance and step out of your comfort zone and try something new. Who knows, you might find you like it.
Until we craft again!
Aunt Dee
Yay!!! Great job on the Blog post, but specially on the GORGEOUS and precious book you made. Your calligraphy looks awesome (I'm SOOO proud of of you!)!! I'm making myself a subscriber to your Blog now—excited to see more! :)
ReplyDeleteThanks Christy, I just happen to have a fabulous Calligraphy Instructor who voice I hear everytime I start writing. She says "Write slower" Turns out she's right!
Delete